Important before starting work
Before creating an invoice, it is important to remember one rule:
after clicking the “Print” or “Email” button, the invoice can no longer be modified. Therefore, all details must be carefully checked before printing or sending it.
HOW TO CREATE AN INVOICE
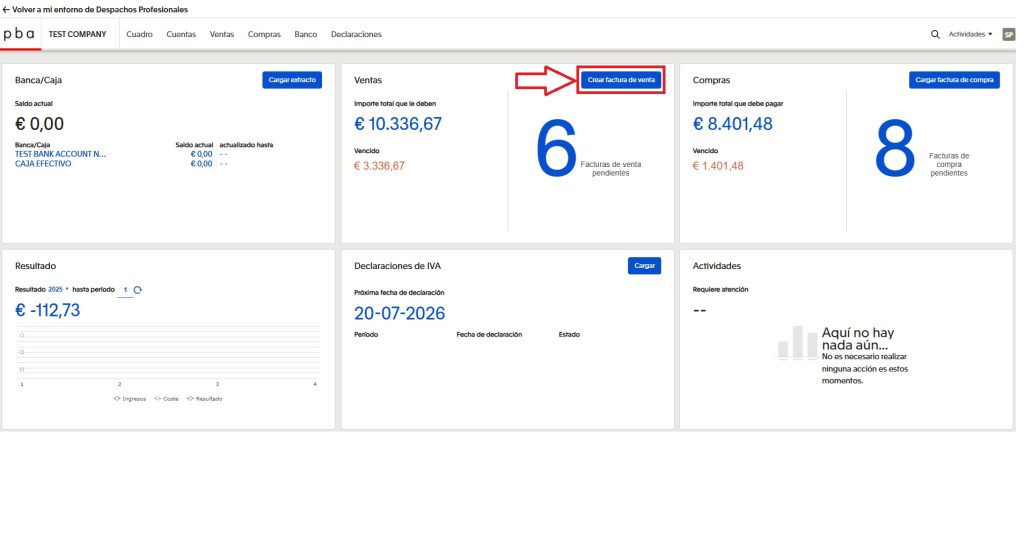
After clicking the CREAR FACTURA DE VENTA button, the system opens a window where all the invoice details must be completed.
The first step is related to selecting the client. In the Seleccionar cuenta field, you can choose a client from the existing list or create a new one.
To create a new client, double-click on the empty field and then click the Nuevo button. A new window will open, where you must enter the minimum required client details.
In the Dirección field, enter the street name and house number.
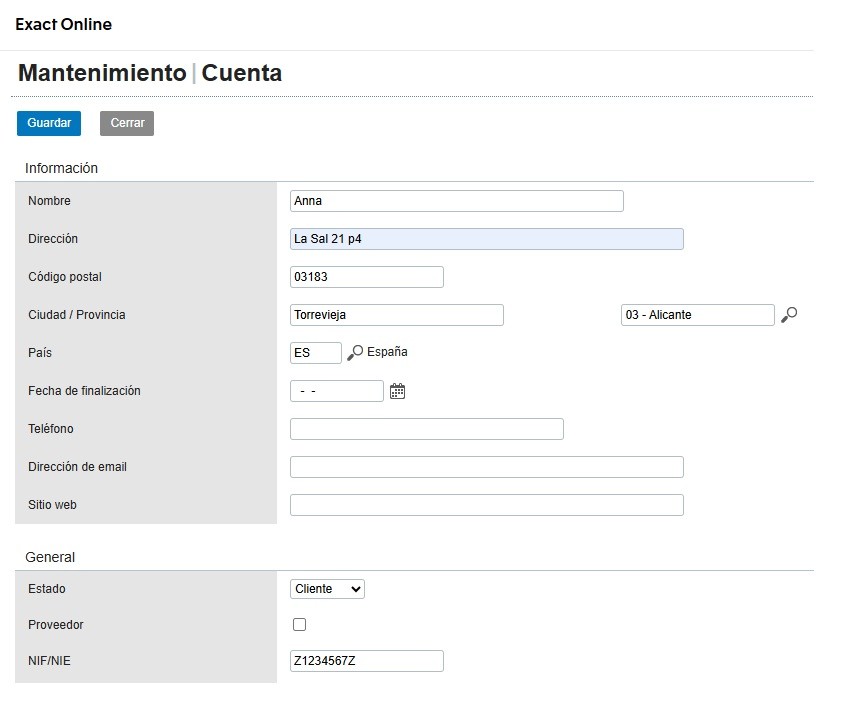
In the Nombre field, enter the first and last name or the company name.
In the Código Postal field, enter the postal code.
In the Ciudad/Provincia field, enter the city and province.
In the País field, enter the country code.
In the NIF/NIE field, enter the client’s tax identification number or other identification number.
To save the details, click Guardar.
Next, the parameters of the invoice itself are completed.
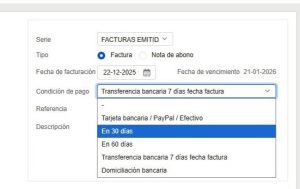
In the Serie field, use the value Facturas Emitidas A Clientes.
In the Tipo field, select Factura.
For Fecha de facturación, the system automatically sets the current date, but it can be changed if necessary.
In Condición de Pago, you can select the payment terms.
The Referencia and Descripción fields are optional and may be left blank.
After this, you can proceed to describing the goods or services.
Cantidad – enter the quantity.
Artículo – select the product or service from the list of available items. In the displayed line, you can enter your own description if needed.
Precio – enter the price per unit.
IVA – select the VAT type applicable to the specific case. If you have any doubts about choosing the correct VAT code, please refer to our article, which explains in detail the possible VAT (IVA) rates: link.

At the very bottom of the invoice, there is a text field for notes. In this field, you can enter additional comments.
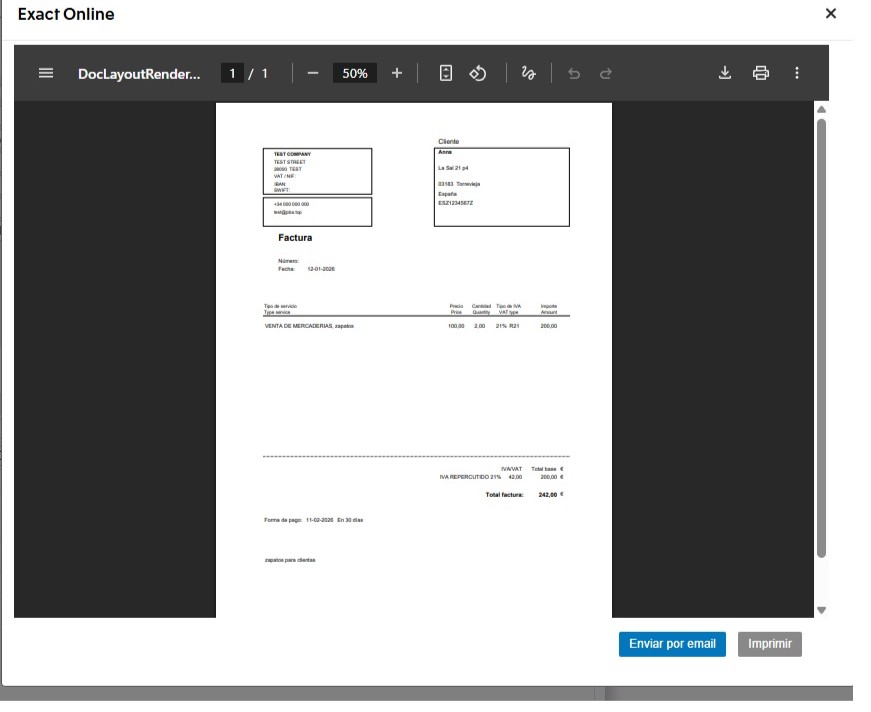
Before sending an invoice, it is always recommended to use the Vista Previa de la Factura function. This is a preview that allows you to check the accuracy of all details, including amounts, tax rates, client details, and item descriptions. If everything is correct, the invoice can be registered.
To register the invoice, there are two available options. The Imprimir button allows you to save the document as a PDF or print it if needed. The Enviar por Email button is intended for quickly sending the invoice to your client.
Document drafts are saved automatically if the process of uploading or completing the form has been started but not fully finished. This allows you to return to the document later and continue working without having to re-enter the data.
Saved drafts can be viewed in the Ventas section. Within this section, a list of clients is displayed. These documents have not been submitted for processing and are not included in the accounting records until they are finally confirmed.
Draft deletion is also performed from the same section. Next to each draft, the delete function (Eliminar button) is available. Once deleted, the document is permanently removed from the list and cannot be recovered. If a draft is no longer needed or was created by mistake, it is recommended to delete it to avoid confusion with active documents.
